GET A QUOTE
Stainless Steel Rope Mesh City Background
PRODUCTS August 7, 2026 6 MIN READ

Blog:Installation Tips For Stainless‑Steel Rope Mesh Balustrade System

Installation Tips For Stainless‑Steel Rope Mesh Balustrade System Published: August 07, 2026 | For Contractors, Site Installers & Architectural Specifiers Stainless‑steel rope mesh balustrade serves as lightweight, transparent safety infill for balconies, staircases, atriums and pedestrian bridges. Good mesh quality cannot guarantee project success; improper installation leads to mesh sagging, aperture deformation, fitting loosening and […]
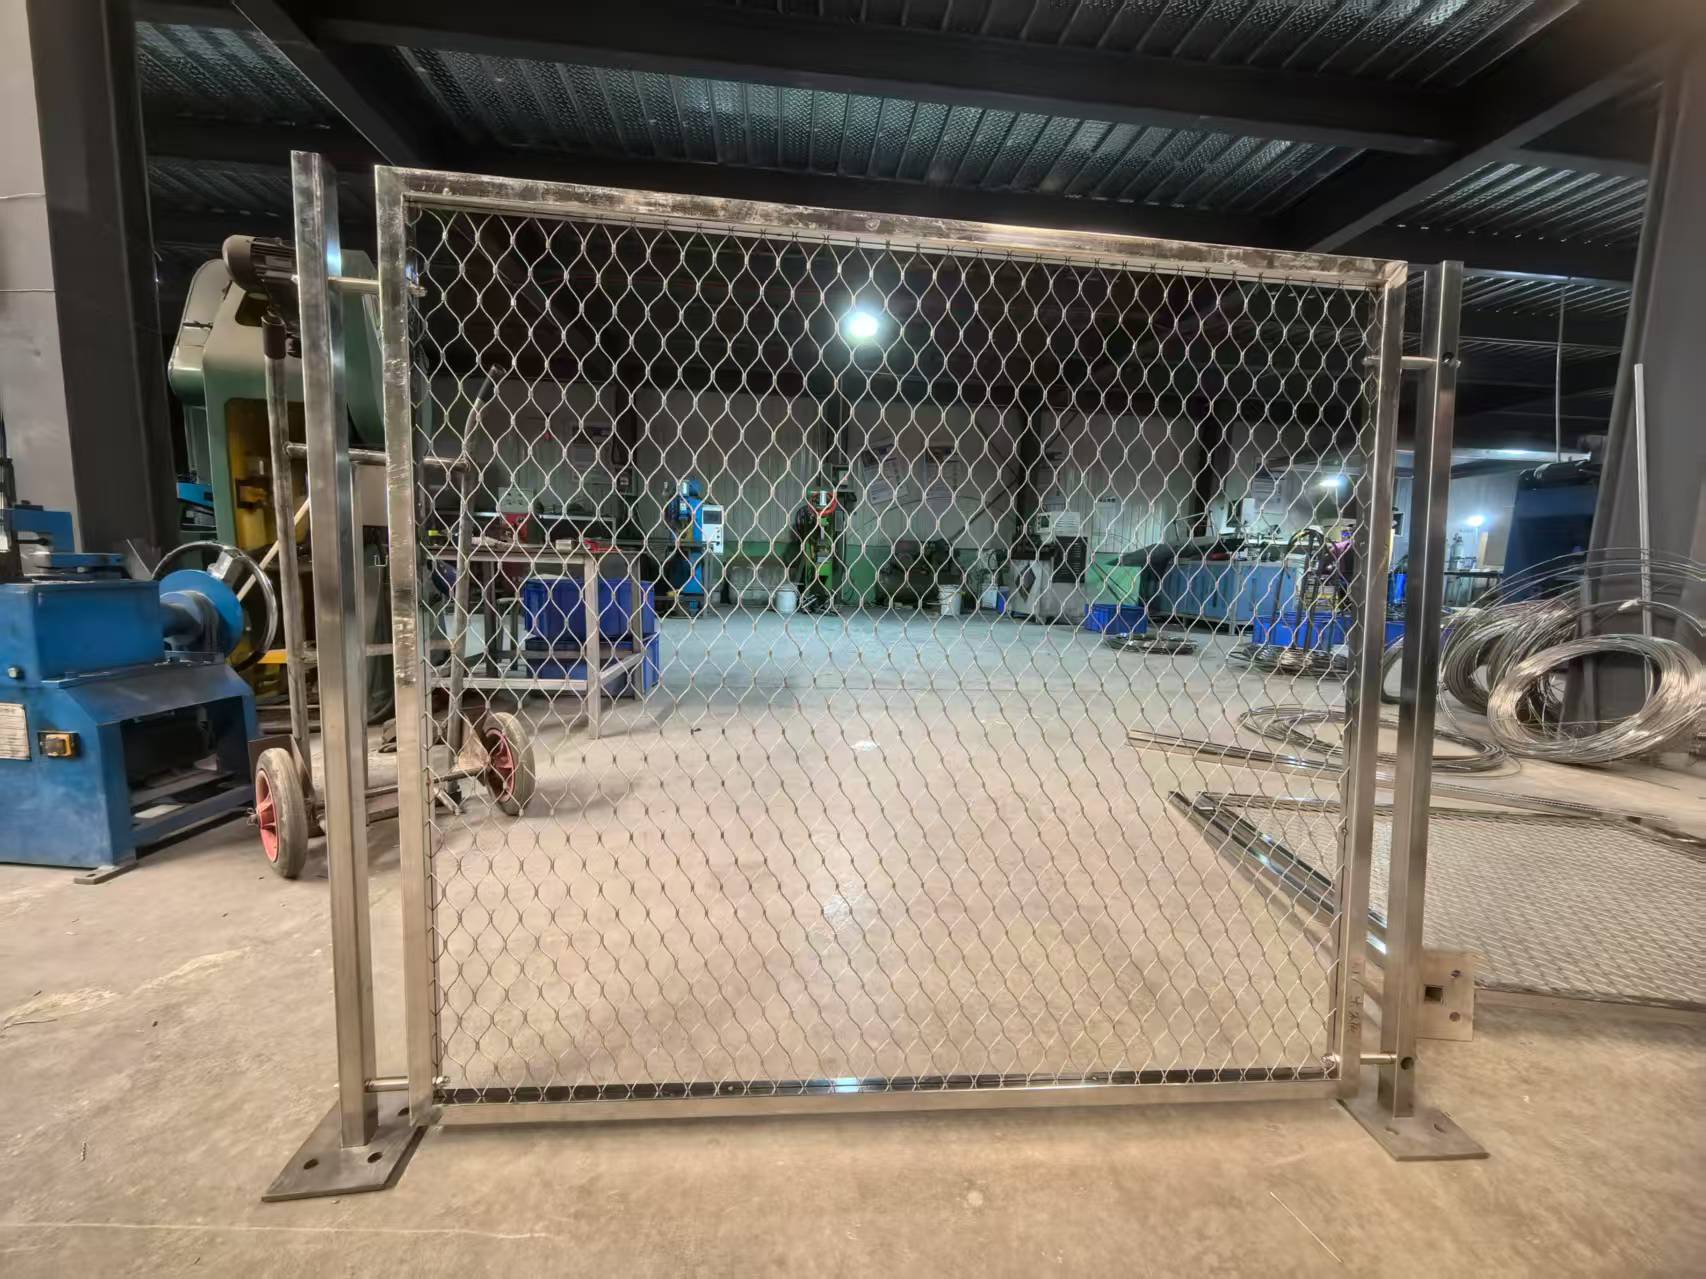
Installation Tips For Stainless‑Steel Rope Mesh Balustrade System

Published: August 07, 2026 | For Contractors, Site Installers & Architectural Specifiers

Stainless‑steel rope mesh balustrade serves as lightweight, transparent safety infill for balconies, staircases, atriums and pedestrian bridges. Good mesh quality cannot guarantee project success; improper installation leads to mesh sagging, aperture deformation, fitting loosening and non‑compliance with local building safety codes. This practical guide covers site preparation, frame requirement, fixing & tension workflow, typical pitfalls and long‑term maintenance, linked with our stainless‑steel rope mesh for modern architecture.

1. Pre‑Installation Site & Frame Preparation

  • Structural substrate check: Support posts and mounting base must connect to solid concrete or structural steel; never anchor onto thin plaster, hollow brick or decorative finishing layer. Concrete base recommended minimum C30 strength.
  • Post spacing limit: For balustrade infill, intermediate post spacing ≤1000 mm. Too‑wide spacing causes excessive mesh deflection under lateral human impact.
  • Post plumb & flatness: All vertical posts must be perfectly plumb; top and bottom mounting rails keep level. Misaligned frames will create uneven mesh tension.
  • Material matching: All clamps, bolts, eye‑bolts and tension hardware must use same stainless grade as mesh (304 or 316). Mixed metal grades trigger galvanic corrosion risk.
  • Thermal expansion reserve: Stainless steel expands under temperature change. Reserve small clearance at mesh edges, avoid rigid full‑edge locking without allowance.
  • Confirm mesh type: Public‑access balustrade must adopt ferrule‑crimped vs hand‑knotted rope mesh ferrule‑crimped mesh; hand‑knotted mesh is not permitted for vertical safety balustrade due to possible knot‑slip risk.

2. Required Installation Tools

  • Laser distance meter (site measuring, tolerance ±3 mm)
  • Professional stainless‑steel wire rope cutter (no hammer cutting, avoid wire strand fraying)
  • Ratchet tensioner / turnbuckles for gradual tension adjustment
  • Cable tension gauge (critical for commercial public projects)
  • Torque wrench for uniform bolt tightening torque
  • File & sand cloth: deburr sharp cut wire ends for anti‑cut safety

3. Step‑by‑Step Installation Workflow

Step 1: Unpack & Lay‑out Mesh Panel

Unroll mesh flat on soft protective mat, prevent scratching mesh surface. Do not twist or kink the rope; permanent kink will reduce rope tensile strength. Position panel inside balustrade frame, mark trimming margin along top‑bottom & side edges.

Step 2: Fix Four Corner Points First

Secure four corners with stainless steel clamps / eye‑bolt assemblies. Do not fully tighten at this stage — keep partial loose for later whole‑panel tension adjustment.

Step 3: Gradual Tensioning (Core Procedure)

  • Follow center‑outward alternating tension sequence: start tension from panel center, then alternate toward top, bottom, left and right edges. Never fully tighten one single edge first, which will pull posts out‑of‑plumb and deform mesh aperture.
  • Apply tension incrementally, small adjustment each time. Target: mesh stays taut, no obvious sag under hand push; meanwhile keep original diamond aperture geometry, do not over‑pull to distort mesh shape.
  • Commercial public projects: use tension gauge to record tension value for project inspection file.

Step 4: Edge Clamping & Trimming Excess Mesh

After overall tension balanced, install intermediate clamps along top, bottom and side frames with uniform spacing. Cut surplus mesh with dedicated rope cutter, file all sharp wire ends smooth to prevent hand‑cut injury.

Step 5: Full‑system Inspection

Check every clamp bolt torque; push mesh manually to test deflection. Verify aperture still meets local safety sphere‑test requirement after tension loaded. Confirm no sharp exposed wire ends left.

4. Key Safety & Code Compliance Reminders

Item Requirement Risk If Ignored
Balustrade Height Residential ≥900 mm; Commercial / public ≥1100 mm (measure from finished floor) Fail building code inspection
Maximum aperture ≤50 mm for public balustrade anti‑trapping Child‑head trapping hazard
Post spacing ≤1000 mm for rope‑mesh infill balustrade Large mesh deflection under human lean‑on load
Coastal / pool‑side environment Mesh + all fittings SUS316 / 316L grade, see 304 vs 316 stainless steel rope mesh Tea‑staining & chloride corrosion in short‑term

5. Most‑Frequent Installation Mistakes To Avoid

❌ Mistake 1: Over‑tensioning mesh panel

Excessive tension deforms diamond aperture, bends support posts, pulls anchor bolts loose; even causes hidden fatigue damage on rope strands.

❌ Mistake 2: Under‑tensioning / only fix mesh corners

Middle area sags heavily, aperture expands under lateral push, fails safety sphere‑test.

❌ Mistake 3: Mounting onto non‑structural substrate

Anchors pull‑out under impact load, creates serious fall‑safety risk.

❌ Mistake 4: Mixed‑grade stainless hardware

Different stainless material contact triggers galvanic corrosion, fittings get rusted ahead of mesh service life.

❌ Mistake 5: Leave sharp cut wire ends exposed

Sharp strand ends cause hand‑cut injury for users and maintenance staff.

6. Post‑Installation Maintenance Tips

  • First‑year re‑check: Stainless rope will have slight tension relaxation after several months. Re‑inspect tension and bolt tightening status 3‑6 months after hand‑over, especially for outdoor projects.
  • Cleaning: Use warm water plus mild neutral detergent, soft cloth. Never use steel wool or abrasive cleaning powder which scratches surface and destroys passive anti‑rust layer.
  • Coastal / salt‑spray zone: Clean every 3‑6 months to wash away chloride salt deposit, reduce tea‑staining probability.
  • Annual inspection: Check ferrules, clamps, bolts for looseness; check rope strand condition for abrasion damage.

FAQ For Installers & Architects

Q: Can hand‑knotted rope mesh be used for balustrade safety infill?

Not recommended for public‑access safety balustrade. Long‑term repeated pushing may make knots slip and aperture expand. Ferrule‑crimped mesh is the standard safety choice.

Q: My mesh sags after installation, should I tighten it as much as possible?

No. Excessive tension damages frame and mesh. First check whether post spacing is too large or posts are not rigid enough; reinforce frame structure before re‑tensioning.

Q: What if project site frame already finished, can you give installation guidance?

Send frame dimension photos and drawings. Our engineering team can review structural suitability and offer on‑site installation suggestion, together with rope mesh aperture & wire diameter selection guide.

Balustrade Mesh Technical Support

We provide installation reference drawings, hardware matching list and technical documentation for stainless steel rope mesh railing. If you need project‑specific installation advice, share your project drawing, site environment and local building‑code requirements.
WhatsApp
whatsup QR Code
Scan to Contact
WeChat
WeChat QR Code
Scan to Contact
Call Us
Email Us